During the last 2 weeks i was able to install the basic shell structure. I used a mitre saw from Metabo to cut all the wood. Please have a look at the pictures….
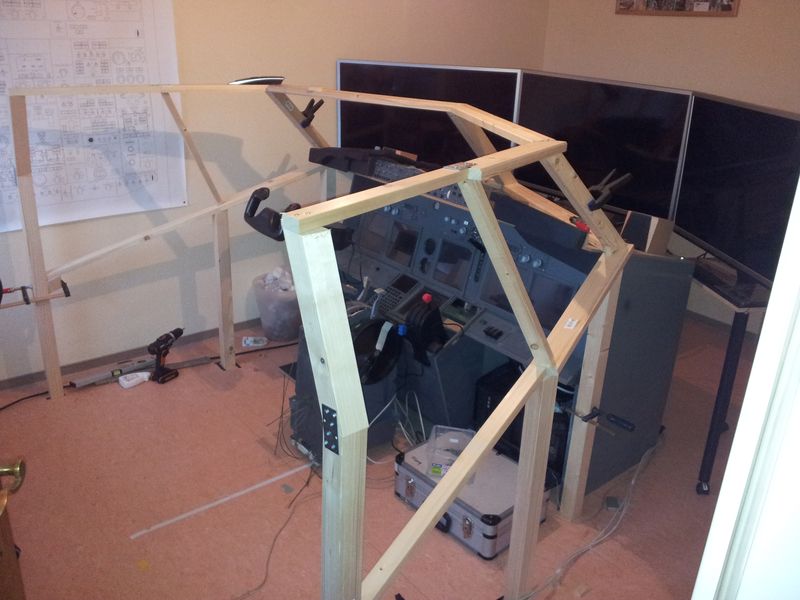
The basis for the shell is divided into 3 parts: Forward cockpit windows and two wall segments.

The roof of the cockpit is put onto the lower part

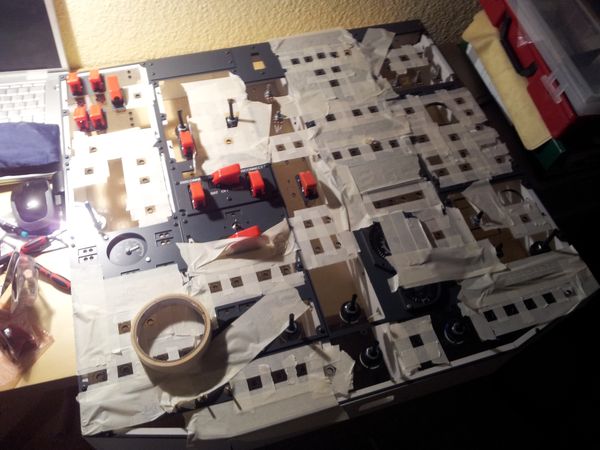
The overhead panel finds its home in the upper part of the shell. It is held in place by 4 M8 screws.
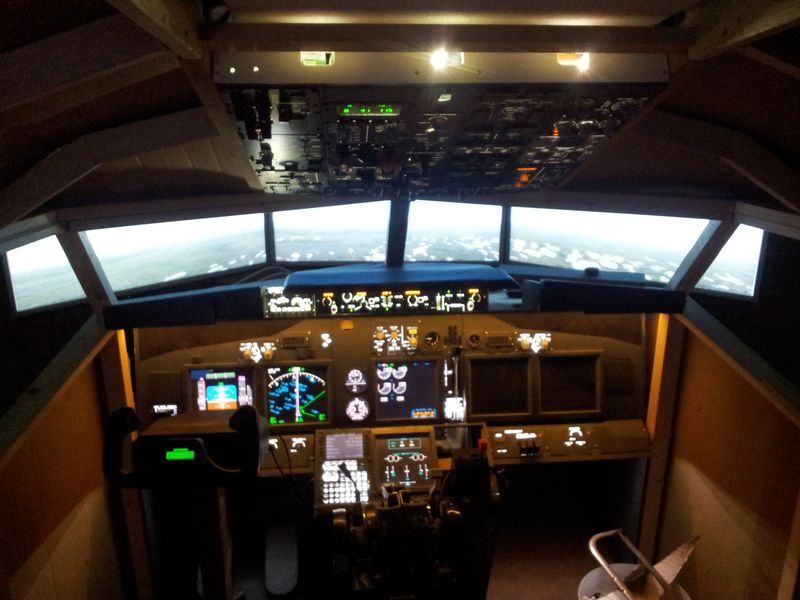
The shell structure has been closed temporarily with plywood and cardbox. It is really a big difference now to sit inside the sim….