
I decided to buy the Overhead (OVHD) panel instead of making it by myself. Making annunctiators on my CNC is pain in the ass. And there are a lots of annunctiators in the OVHD. So i decided to get a kit version of an overhead panel and do the rest by myself.
The kit was bought from Poldragonet. The overall quality of the panel is very good considering the small price you pay.
I placed the oder via Email and the box arrived 5 weeks later. The packaging was very good and all items arrived in good condition.
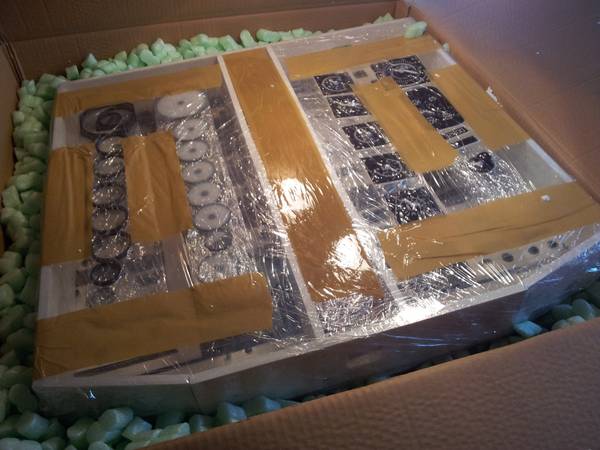
good Packaging
The package from Poldragon included:
– pre assembled Overhead panel with white frame (The frame is made of soft plastic. Not very sturdy but ok)
– set of all switches, rotary sitches, encoder (low quality encoders, i used better ones)
– switch covers (security cover, lift to get access to the switch)
– all LEDS
– all Annunctiators
– Fake Gauges for APU EGT, Cabin Alt, Landing Alt, Duct Pressure and many more
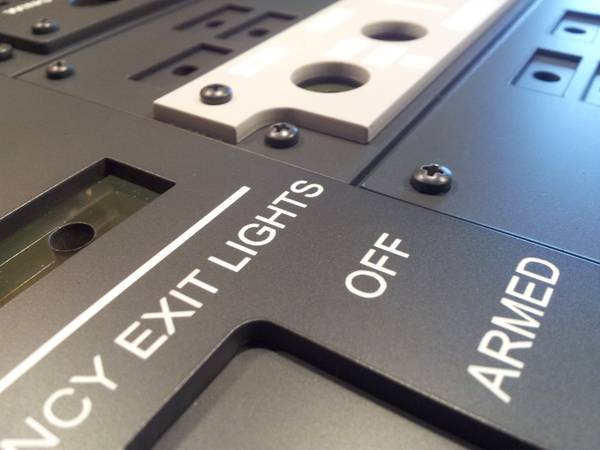
Details of Panel
The quality of the panels is very good. The laser engraved characters are sharp, clean and readable. The Overhead uses a transparent acrylic layer as basis. All panels are screwed onto that base Layer.
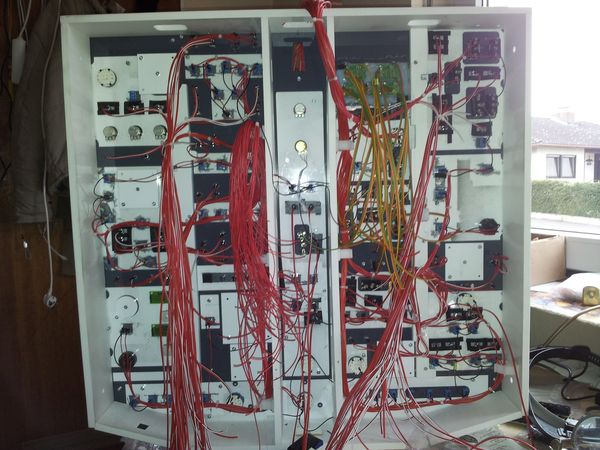
- Lots of cables. And i still only have one end of them finished…

Close up photo of Light switches
Some words about the switches. For the small money you pay – you only get the small cheap switches from China. I strongly suggest, that you buy better and bigger switches (APEM !!). I did not do it and installed the switches included in the kit. Now after i finished everything i am disappointed about my decision. Some day i will replace the small switches with better one. They just give you a better haptic feeling.
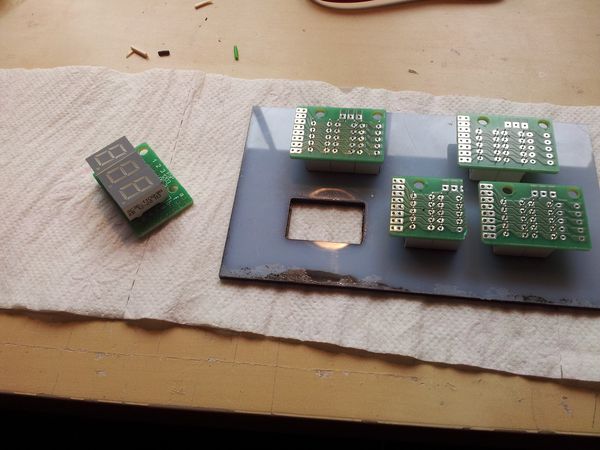
Detail pic of the Holder panel i made for the 7 segment displays
Lots of hot glue was used to fit the Holder for the Elec Displays at its place
System of interfacing:
– Switched, Encoders, Rotary Switches are all connected to 3 x Pokeys 56E cards
– All Leds are connected to 2 x Phidgets LED 64 USB cards
– 7 Segment displays (Elec Panel, Ground Altitude, Cabin Altutude) are connected to 2x
7 Segment Display Driver Board from Flightsimparts.eu which in turn are driven by the pokeys cards
– Gauges will be connected to Opencockptis or Pololu Cards in the future.
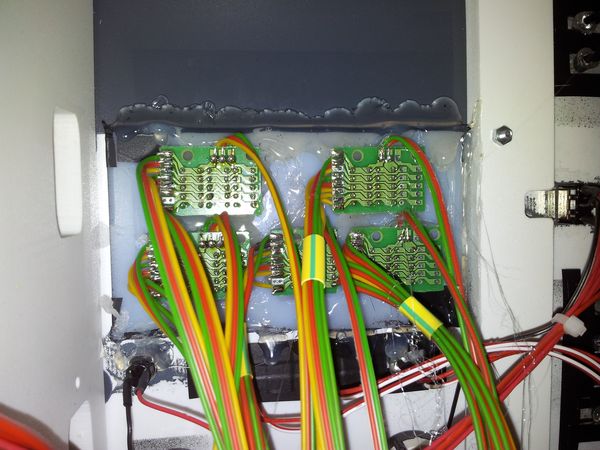
The switches share a common GND pole. So i run one black GND wire from switch to switch. Only the positive poles are wired to the respective inputs on the pokey cards. That saves a lot of wire.
The leds are connected with positive and GND to the Phidgets cards.
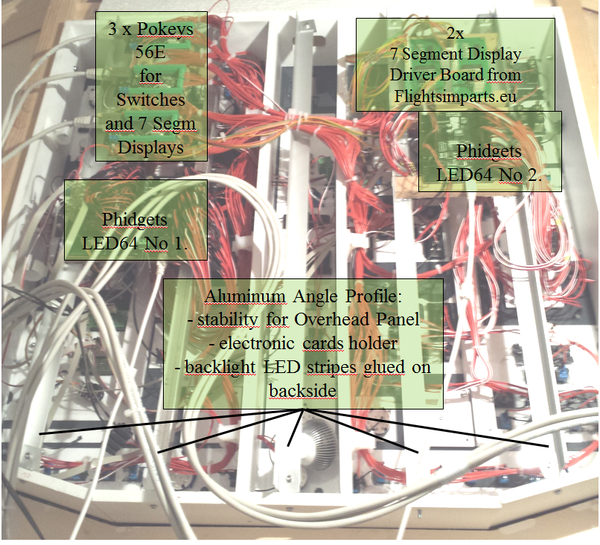
Here you can see which components are used .
On the picture above you also can see the 5 aluminum angle profiles which have been screwed into the frame.
They serve three purposes.
1. provide stability for the OVHD frame
2. they are used as holding platform for the several interface cards
3. The are the basis for the backlight system: on the bottom side of the alu profiles i glued white LED stripes. They require 11V and can be dimmed.
General Impression after installation and test:
I am satisfied with the overall appearance of the my new overhead panel. It adds a lot to the simulation and increases immersion. There are only two things which are not optimal. The small switches so not provide a nice haptic feeling when switching the. The second thing is the brightness of the LEDs. While the LEDs are very bright outside, when they are glued into the holes on the backside of the annunctiators, they lose a lot of brightness, because the material used for the annucntiators is milky and not transparent. I did not dare to increase the voltage for the LEDs in the Phidgtes Program, because burning all 100+ LEDs and changing them would be a nightmare. All connections have been soldered, convered with shrinking tube and glued in place. A LOT OF WORK !!!
Hi My name is Arnaldo,
And i have an OVHD like yours. May I have more detailed pictures to see better how you put the cards on aluminium profiles and how yoy connected the leds to the phidgets cards?
Many thanks
Arnaldo
I used Aluminium Rails as basis. The interface cards are fixed on MDF sheets which are attached to the rails with Hot glue. Under the alu rails i put white led stripes for backlighting.
Andy
Hi flightsimbuilder
I’ve exactly the same OVH and some pokeys 57E but I wonder if you have you wiring schema (in/outs in each pokey)
I can develop lua scripts (fsuipc) for the pokeys57E or 56U so if i have exactly you connection schema I would provide you the final script (I don’t use FSSymphony as It drawns some ressources from the CPU much more than LUA)
hello there,
is there an email address i can reach you at?
thank you
Hi I’m Daniel i about to piece together supplies for an OH build. I have one question how does prosim recognise 2 phidget cards from its dropdown menu when assigning leds to and output?
Will they be number 1 and 2 or a and b in the prosim menu ?