
The original design for the interlink-system was taken from Burkard with his approval. Please also visit his site under http://homecockpit-737ng.blogspot.de/
The original yokes have been purchased from Holland. Unfortunately i was not able to get the information from which specific aircraft the Yokes where taken from. In know that they are from a 737-300 which is nice, because the TQ is from the same 737 version.
The condition of the yokes is – ….used…… The biggest setbacks are that the trip counter is missing on the Capt. Yoke and the wiring has been cut completely on the FO Yoke. Below is the condition of the yokes as i purchased them.
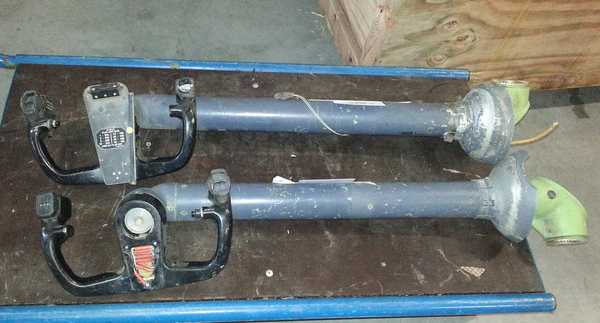
The Yokes
To use the Yokes in my Sim i plan the following activities:
1. Mechanics
2. Rework of the yokes itself (cover for missing Trip Counter and cover plate for the FO Yoke front)
3. Wiring
1. Layout of the mechanical Connection
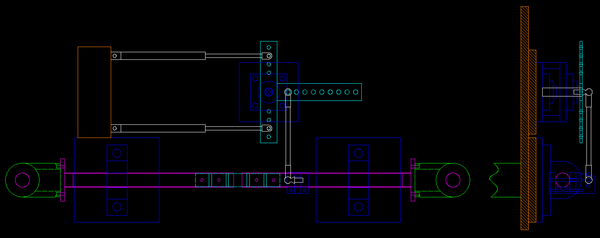
First drawing of interlink System
The Basic mechanical Connection is based on the good idea by Burkhard ( http://homecockpit-737ng.blogspot.de/ ), so all the credits go to him…
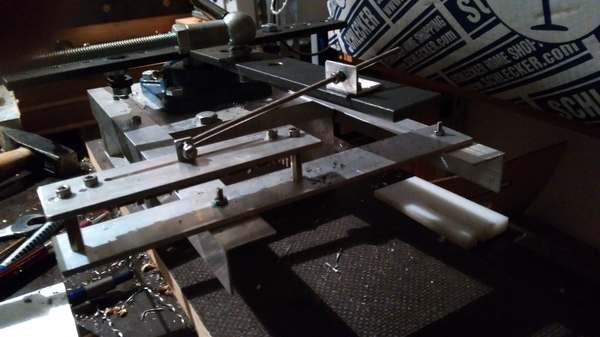
Please have a look at the Picture to get the idea how the System works:

The movement of the yokes is transferred to gas springs with 150N each.
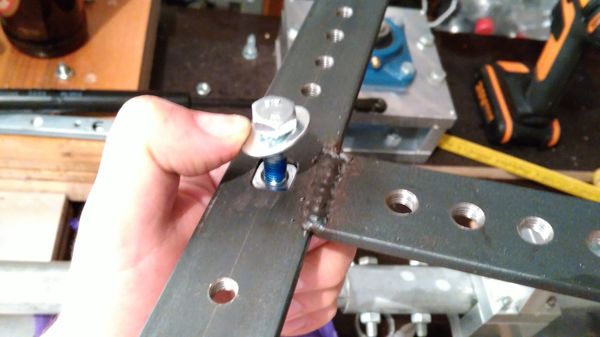
The below Picture shows how the original Boeing Part is connected to the central axis. I used a turned metal part with drill holes and made holes with M8 Threads in the yoke. The two parts are screwed together. The Adapter has been screwed into the main tube – i need to weld it together, the two screws you can see are not enough. I still have some Play between the yoke and the main tube.
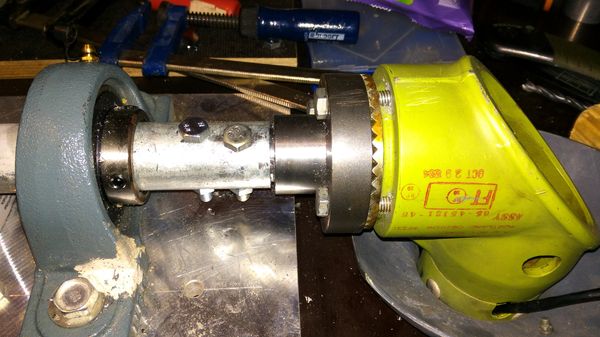
Close up of Adapter
In the below Picture you can see the clamp part which Transfers the Rotation of the main tube to the T Part in the back. The clamp part has been build from several single parts (aluminum) and screwed into the main tube. When you Pull or puch the yoke (Elevator rudder) the main tube will turn and push the rod in the Background.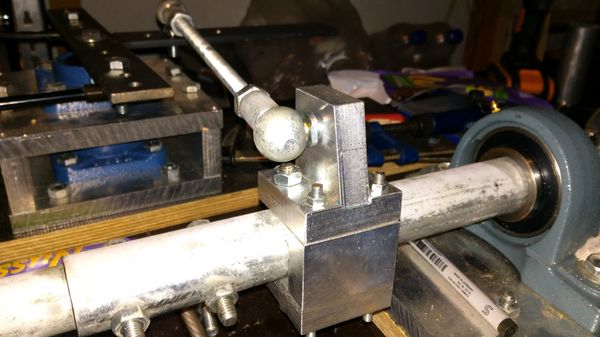
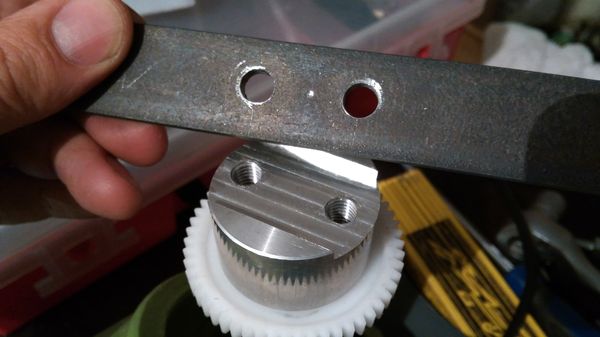
Detail of the T-Part below. You can see in the middle that i milled a square hole and the bolt also has a square shape which fits perfectly into the T-Part. This way i can avoid unnecessary play between these pieces. I also used Lock-Tite to prevent the screw from loosening.
T-Part
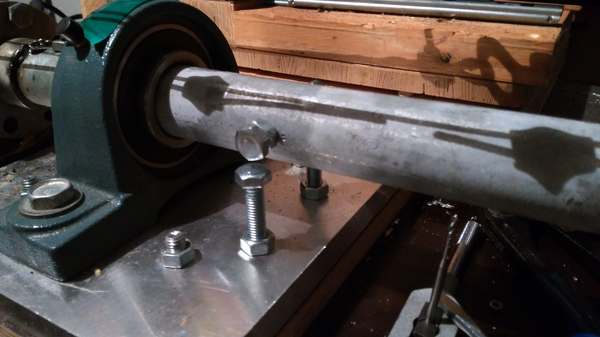
Below you see the block with the two bearings which holt the shaft for the T-Part. Very stable. The single parts are made from Aluminum and screwed together.
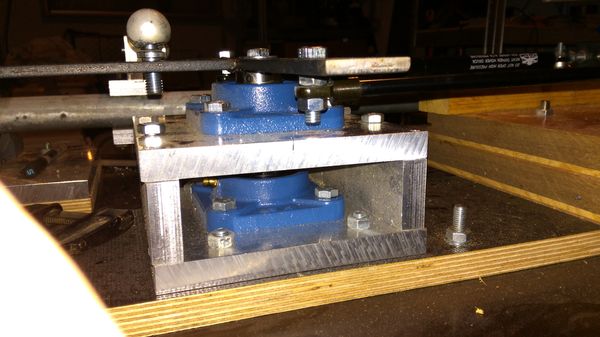
Block for T-Part
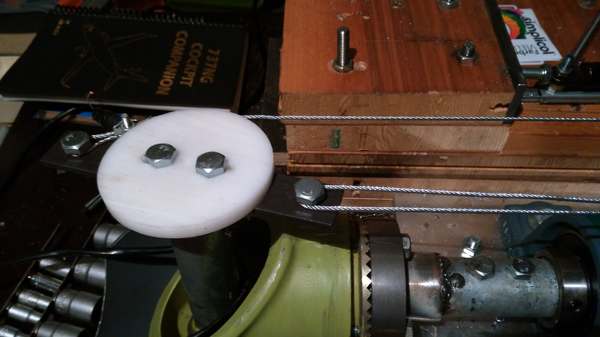
Below you see the shafts of the Yoke Columns with the turned Adapters inserted. On top again i use metal pieces which holds the steel wire Ends for the movement synchornization of the Aileron movement (turn left and right like steering wheel in your car).The tooth wheel is attached direct on the shaft – the turning movement is picked up by potentiometer….
The White disc on top will tention the steel cable when the yoke is turned and this way it stops the movement… It works very good !
Below you see the potentiometer conection to the metal Piece which translated the Push / Pull Movement to the Gas springs (and the potentiometer of course ; )
The Push / Pull movement is limited by the screws which you can see in the Picture below. It is very easy to adjust the traverway of the yoke now. (+10° Forward – 10 ° backward)
2. Rework of the FO Yoke
The condition of the FO yoke was not very good. The front plate was missing and the wiring has been cut off. So i Need to make a new cover plate for the front. The trip Counter will be put to the CAPT Yoke and the resulting hole Needs to be covered.
First take everything apart:
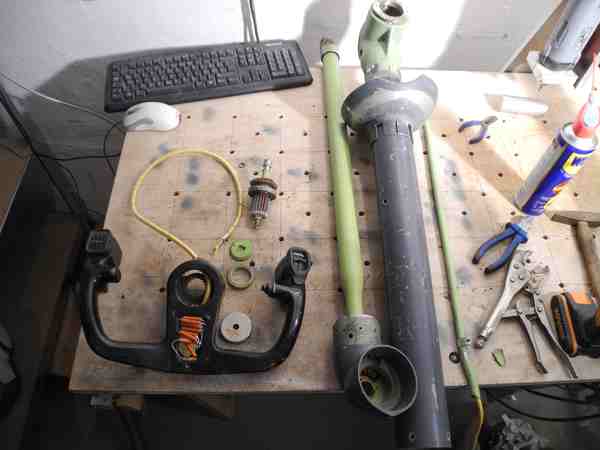
Taking everything apart
Make a new cover for the yoke front.

I used MDF and made a nice cover for the front of the FO yoke. I needed to cut new threads into the yoke to pix the plate with 3 screws.

Painted and finished

Cover for Trip Counter
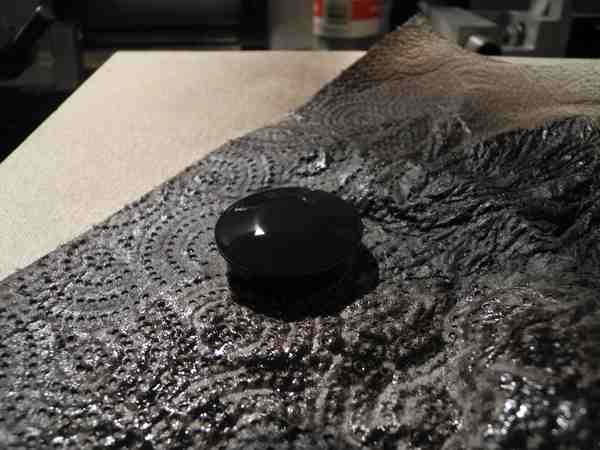
Painted
Pingback: Rework and Installation of original B 737 Yokes | Masterploxis online
Hi,
Like you, my oem yokes have sat around for a year or 2 and now I have decided to tackle the job. It’s coming along reasonably well but I have run into a problem that I hadn’t noticed earlier. The wiring coming from the FO Yoke column is missing, or I’m hoping it has fallen down inside the tube. The Captains side has 19 conductors protruding from the bottom of the column. So now I must remove the Yoke to gain access to the wiring or maybe I will have to run new wiring. I was wondering if you could offer help in how to remove the yoke from the column. Perhaps you have some pictures from when you removed yours..even good advice on what screws need to be removed. I have come so far already that I want to dismantle the least amount possible to access the wiring. I hope you can help. A very Merry Christmas to you, or Happy Holidays, best wishes for however you celebrate the season, Thanks in Advance,
Ed